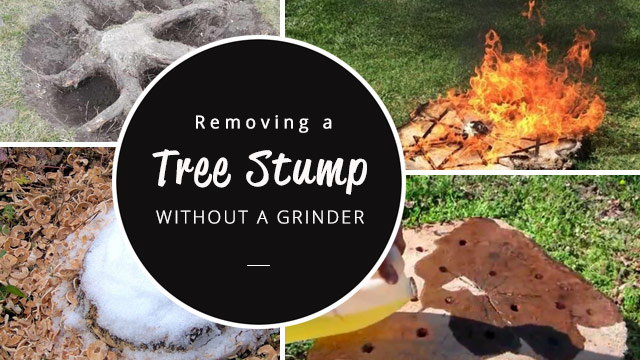
Tree and stump removal can be expensive, especially on top of the cost of removing the tree. You can get a professional out to remove your stump, but there are also a few ways you can remove your stump1 yourself.
The top 3 methods to remove a tree stump without a grinder are:
– By hand
– Chemical
– Burn it out
Below we have detailed each option including the equipment needed, a step-by-step guide, and some safety precautions.
We have a detailed stump removal cost guide here, so you know exactly what a local professional stump removal service might cost you.
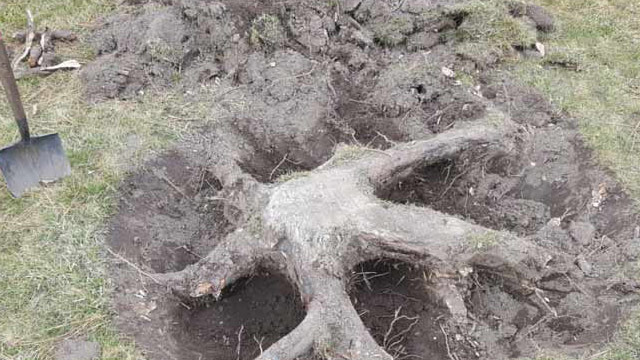
Manually by hand
If it is a smaller tree stump, you can try the good old-fashioned way of removing it manually with a bit of hard work.
It really is harder than you think, so I beg you, do not attempt this on medium or larger stumps, as it will take days to get it done.
The choice of tools for this job can vary depending on your personal preference, but I recommend the following as a minimum.
Tools & Supplies Required
- Mattock
- Shovel
- Heavy steel digging bar
- Axe
Safety equipment
- Steel-toed boots
- Work gloves
- eye protection
Step by Step Guide
Step 1 – Start by digging around 12 inches around the stump with the broad end of your mattock. You may need to dig deeper depending on the size of the stump.
Step 2 – The above step will help you loosen the dirt around the stump. Once done you will need to shovel it out. This is the most laborious part of the task and you need to be prepared to remove large amounts of soil and the bigger the stump, the more soil needs to be removed. The process should be repeated until you have access to roots that need to be cut.
Step 3 – For removing the roots you can choose either a chainsaw if you have it or an axe. You can also make use of a hand saw to sever the roots from the trunk.
Step 4 – You will need to sever all lateral roots from the stump. Make sure you sever them as close as possible to the stump itself. This will give you good access to the taproot.
Step 5 – The taproot is a root that goes straight down directly under the tree. Once the lateral roots have been severed, you will need to dig some more with your mattock to expose the taproot.
Step 6 – In the final step, you will need to cut the taproot either using the large saw or your axe.
You’re done!
Safety Tips
- Don’t take to this job without wearing safety gear. You need to always wear steel-toed boots and heavy-duty work gloves which will help in preventing injuries.
- Avoid digging the trench close to the stump as this reduces your room for maneuverability and increases the chance of injuries.
- Make sure your kids and pets aren’t around and even people who aren’t involved in the job. An unintentional error might lead to an injury to your loved ones.
- Aim your axe extremely carefully while swinging as hitting dirt instead of the taproot would dull the blade and require frequent sharpening.
Chemical stump removal
Using chemical removal2 for medium to large stumps is ideal. This process is essentially a technique for speeding up the decay of the stump through chemical reactions.
The only con with the process is that it is much slower as compared to manual removal or burning as you will have to wait for the chemicals to work their magic. While there are ways in which you can speed up the process of stump removal by increasing the moisture of the stump the process would take about 4-6 weeks to start showing results and the entire stump may take even a year to completely decay.
Tools & supplies required
- Drill and a large bit
- Plastic tarp
- Longbow saw
- Garden mulch
- Hay
- High-nitrogen garden fertilizer/Potassium-nitrate tree stump removal granules
- Chainsaw
Safety Equipments
- Steel-toed boots
- Safety gloves
- Eye protection
- simple paper gas mask
Step by Step Guide
Step 1 – Cut the stump as close to the ground as you can using a longbow saw or a chainsaw
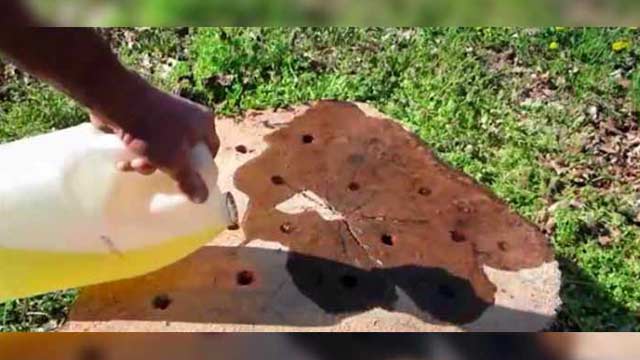
Step 2 – In the next step, you need to drill holes a few inches deep inside the stump maintaining a gap of around an inch between the holes. Use the widest drill bit available as the deeper and wider you go, the better for you.
Step 3 – Next you need to pour water into these holes and then add high-nitrogen garden fertilizer or potassium-nitrate granules.
Step 4 – Once done you will need to cover the entire stump with a plastic trap. This is important as it prevents moisture from escaping. Moisture is very important for the nitrogen to work and this speeds up the entire process.
Step 5 – In the next step cover the plastic trap with organic mulch and pour lots of water over it. This will ensure that the chemicals would have adequate moisture to work their magic. You can add additional layers of hay over it and then water it thoroughly. Covering the stump also prevents a dog or cat from getting access to it.
Step 6 – You need to periodically remove the hay, much, and the plastic trap and pour more nitrogen over the stump and cover it back again. You will need to repeat this process weekly for a period of 4-6 weeks and you will notice that the stump starts to decay.
Step 7 – The stump turning spongy would signal the start of the decay. You can remove some of the decayed wood using an axe. The hardwood beneath should again be treated with nitrogen and water. Once you have reached the ground level you can leave it and let it decay beneath the ground which can take a few months or even a year depending upon the size of the stump.
Safety Tips
- Don’t touch the chemicals with your bare hands.
- Always wear safety gloves and eye protection when working with chemicals.
- Prevent your pets and kids from touching the stump or the mulch as this can expose them to chemicals.
- Wash your hands and thoroughly after you have completed the job and disinfect the tools to avoid contaminating other trees in your yard with harmful chemicals.
Burning the stump
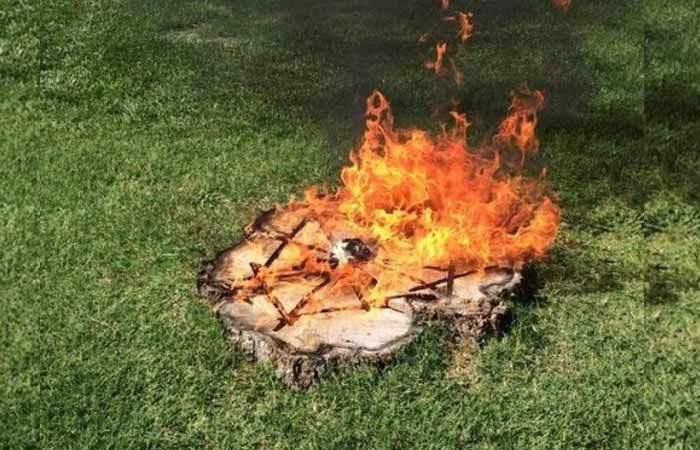
If you are looking for the easiest method to deal with tree stumps this is surely the one for you.
This method can also be used in conjunction with manual removal of the stump if you are growing tired of digging.
Note: Most cities don’t allow outdoor fires during the height of summer, especially if you live near the forest. Floating embers can spark a forest fire so be aware of local laws before you start.
For this technique to work the trees need to have been removed more than 18 months earlier. This will ensure the stump is dry enough to burn. If the stump is still a little green it will not burn properly.
Tools & supplies required
- Drill and large bit
- Mattock and shovel
- Kerosene
- lighter
Step by Step Guide
Step 1 – Use the widest drill bit you have and drill holes into the stump and go as deep as you can as this would make the process faster. You need to drill 3 or 4 vertical holes as well as 4 x lateral holes in the sides that meet the holes in the middle.
You can also just dig around the stump and burn it from the outside in, but the above does seem to yield better results.
Step 2 – Next remove all the debris from the holes. This is to ensure you can put maximum fuel to speed up the burning.
Step 3 – Pour kerosene into the holes. You can use gasoline, but it is a lot more dangerous to work with due to its high burning temperature. Kerosene will do the job.
Step 4 – Let the holes absorb the fuel as it would get soaked in properly. Repeat the process a few times to ensure the fuel is being soaked by the tree.
Step 5 – Cover the stump with some scrap wood and pour some kerosene over it.
Step 6 – Take a fire torch or a lighter and ignite the flame. It will take a while for the actual stump to begin to burn but once it gets going it should take about 24 hours to fully burn.
Step 7 – You can add small sticks and timber to the fire every few hours to keep the fire going. This will speed the process up.
Safety Tips
- This method shouldn’t be tried with stumps that are close to your property or any other trees, nor should it be done in summer.
- Never use gasoline in place of kerosene as this can lead to an uncontrollable fire in the stump
- Make sure your kids and pets don’t venture near the fire when it is burning as this can lead to burning injuries or inhaling smoke.
- You should be on constant watch while the fire is burning and preferably ignite the flames at dawn and make sure you douse them.
- Before heading to bed. If the stump hasn’t burnt out in a day, you will need to put it out and light it again in the morning.
- University of Massachusetts Amherst, (2019) How to Kill a Tree Stump. <https://www.umass.edu/urbantree/factsheets/26killastump.html.> Accessed: 22-02-2024.
- Katie Brooks, (2019) Cut Stump Herbicide Treatment. <https://extension.psu.edu/cut-stump-herbicide-treatment.> Accessed: 22-02-2024.


