


Got your eye on that big tree in your yard, thinking about taking it down? Hold up before you fire up that chainsaw and take a second to think!
Whether you decide to tackle tree removal as a DIY project or enlist the help of a professional arborist, it’s essential to prioritize safety and adhere to local regulations.
Consider the reasons for tree removal, such as safety concerns, aesthetics, and disease prevention, and assess your project’s size, complexity, and necessary tools and equipment.

What we cover
ToggleAssessing your tree removal project
Before diving into DIY tree removal, take a moment to assess the situation. The size and complexity of the tree, as well as its root system, can determine if DIY removal is feasible.
If the tree is too tall, you would need a ladder to reach and remove its limbs. Such a situation can be too risky to tackle on your own.
Additionally, consider the tools and equipment needed for the job and whether you have access to them. Lastly, familiarize yourself with local regulations and permits required for tree removal, as they vary depending on your location.
Size and complexity
To evaluate the size and complexity of the tree and its root system, consider the tree’s height, diameter, and ground level.
Dead trees require extra care and precautions during removal, while trees on bluff or shoreline properties may need different tactics due to their unique root systems.
Keep in mind that the TreeHelp guide covers trees of reasonable diameter and height (up to about 10 inches and not much more than 20 feet) and assumes the trees are on reasonably level ground.
Available tools and equipment
The basic tools needed for a tree removal project include a chainsaw, axe, and pruning shears. Other equipment that may be needed includes a ladder, rope, and safety harness.
If you don’t have access to these tools or are inexperienced in using them, you may want to consider hiring a professional.
Professional arborists often use specialized equipment like aerial lifts and tree chippers, which can make the process much safer and more efficient.
Local regulations
Before starting your tree removal project, it’s crucial to check with your city, town, county, or homeowners association (HOA) for specific rules and regulations.
Regulations and permits required for tree removal vary depending on your location, and you may face fines or penalties for not following them.
By familiarizing yourself with local requirements, you can ensure your tree removal project is conducted safely and legally.
Preparing for tree removal
Now that you’ve assessed your tree removal project and familiarized yourself with local regulations, it’s time to prepare for the big day.
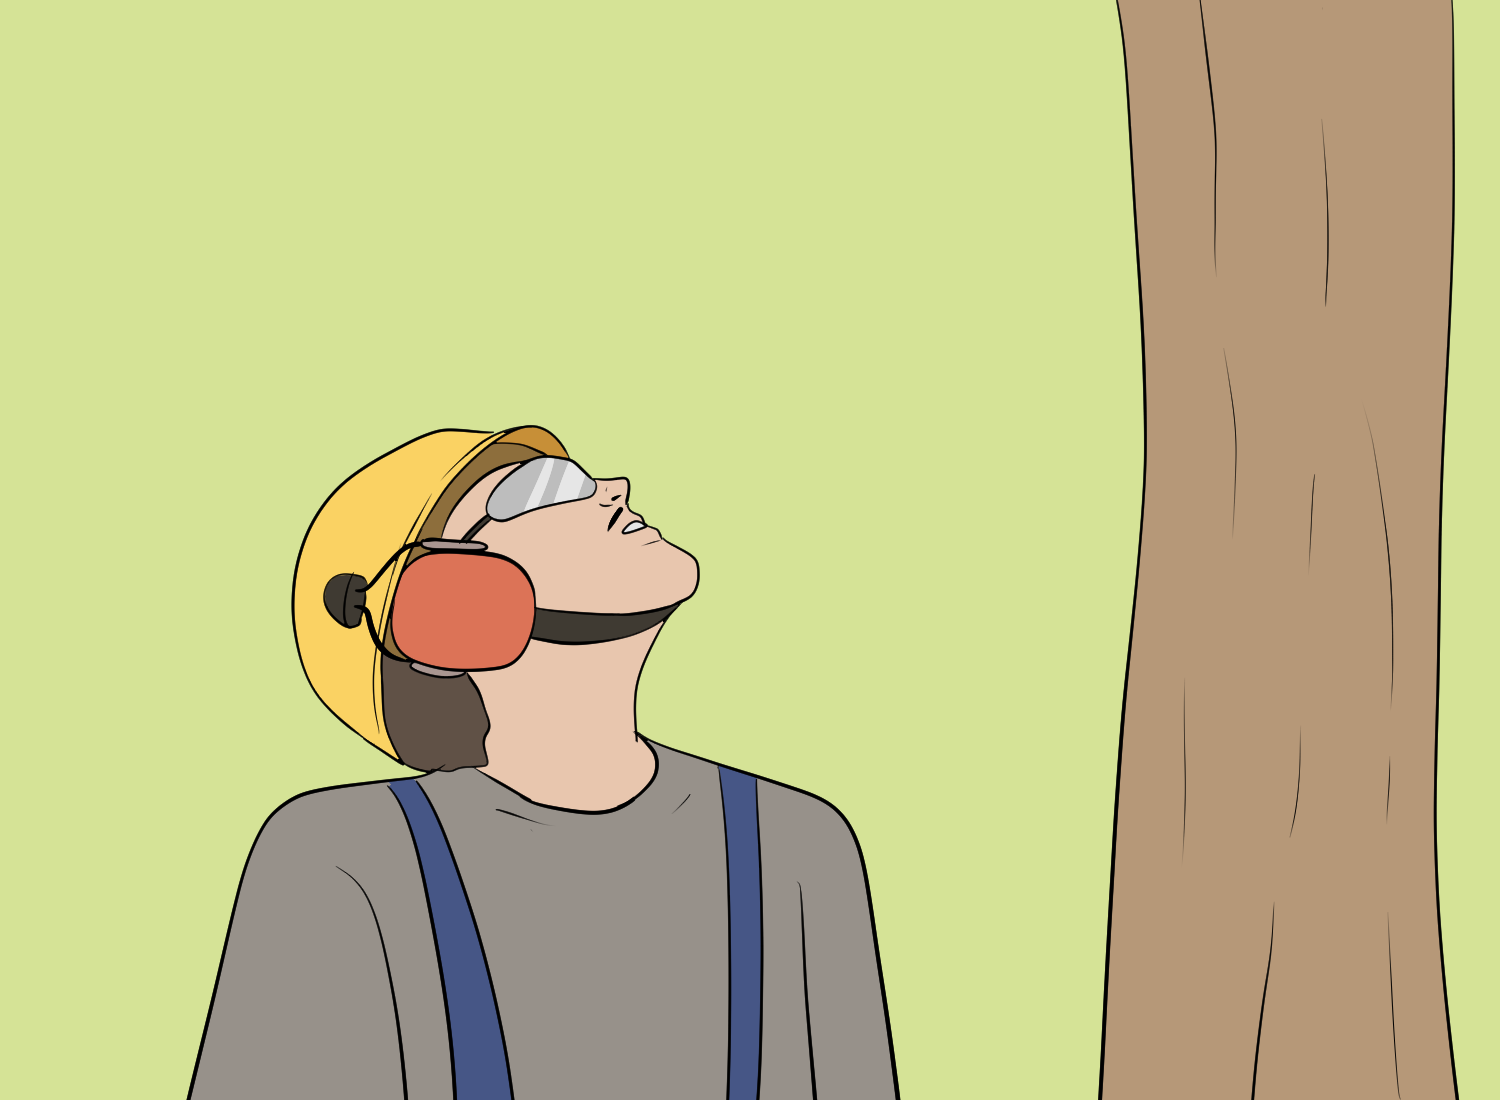
Gather essential safety gear, such as goggles, gloves, and helmets, to protect yourself during the process. Clear the area surrounding the tree to minimize potential hazards, and enlist a helper to assist you throughout the process.
By taking these precautions, you’ll be well on your way to a successful tree removal.
Gather safety gear
Before you start working on your tree removal project, it’s essential to gather the necessary safety gear. Goggles, gloves, and helmets are must-haves for tree removal.
Wearing safety gear according to the manufacturer’s instructions and local safety regulations is crucial to ensure your safety during the process.
Don’t forget to wear other safety equipment like ear protection, steel-toed leather boots, and long-sleeved shirts for added protection.
Clear the surrounding area
Clearing the area around the tree is an important step in the tree removal process. Before you begin cutting, remove any children, pets, or obstacles from the area and inform adults of your plans so they can keep a safe distance.
By clearing away hazards and debris, you can minimize the risk of accidents and injury during tree removal.
Enlist a helper
Having a partner during tree removal can significantly increase safety and efficiency. Choose a helper who has experience and training in proper tree removal techniques and can assist you throughout the process.
Make sure your helper also wears appropriate safety gear and follows all safety precautions.
Together, you can work as a team to make the tree removal process smooth and successful.
Step-by-step tree removal process
With your safety gear on and your helper by your side, it’s time to dive into the step-by-step tree removal process.
Follow these steps to ensure a safe and efficient tree removal experience: plan the fall direction, cut limbs and branches, fell the tree, and finally, remove the stump.
Remember, safety should always be your top priority throughout the process.
Step 1: Plan the fall direction
Before making any cuts, it’s essential to assess the tree’s natural fall direction and ensure it won’t cause property damage.
Ensure the falling path of the tree will not be obstructed by a house, vehicle, fence, pool, or electrical lines. You will want a clear path without any obstructions so you can get out of the area quickly before the tree falls. Plan carefully to guarantee safety when cutting down the tree.
If you’re uncertain about the tree’s fall direction or worried about potential damage, it’s best to contact a professional arborist for help.
Step 2: Cut limbs and branches
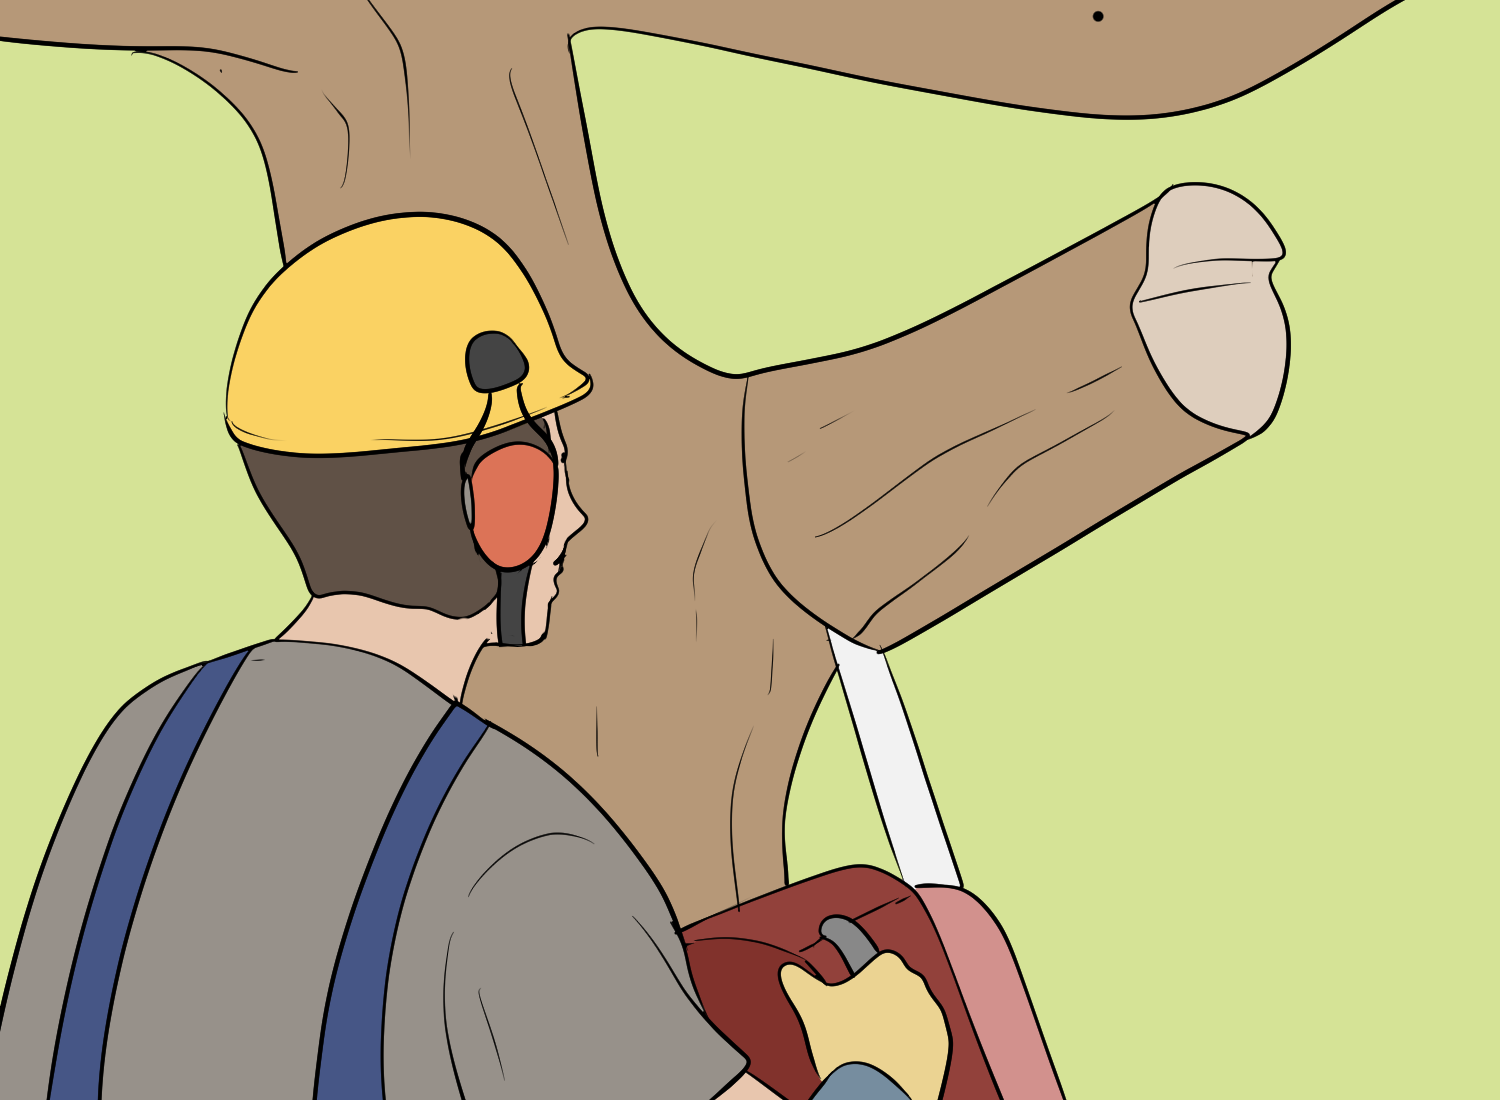
Begin by safely cutting away smaller limbs and branches before tackling the main trunk. Use proper tools like chainsaws, reciprocating saws, or pruning saws, and always wear appropriate safety gear.
As you cut, be mindful of potential hazards such as power lines, other trees, and buildings. Remove any cut limbs and branches as you work. This will help to avoid tripping, as well as becoming snarled in the brush.
Step 3: Fell the tree
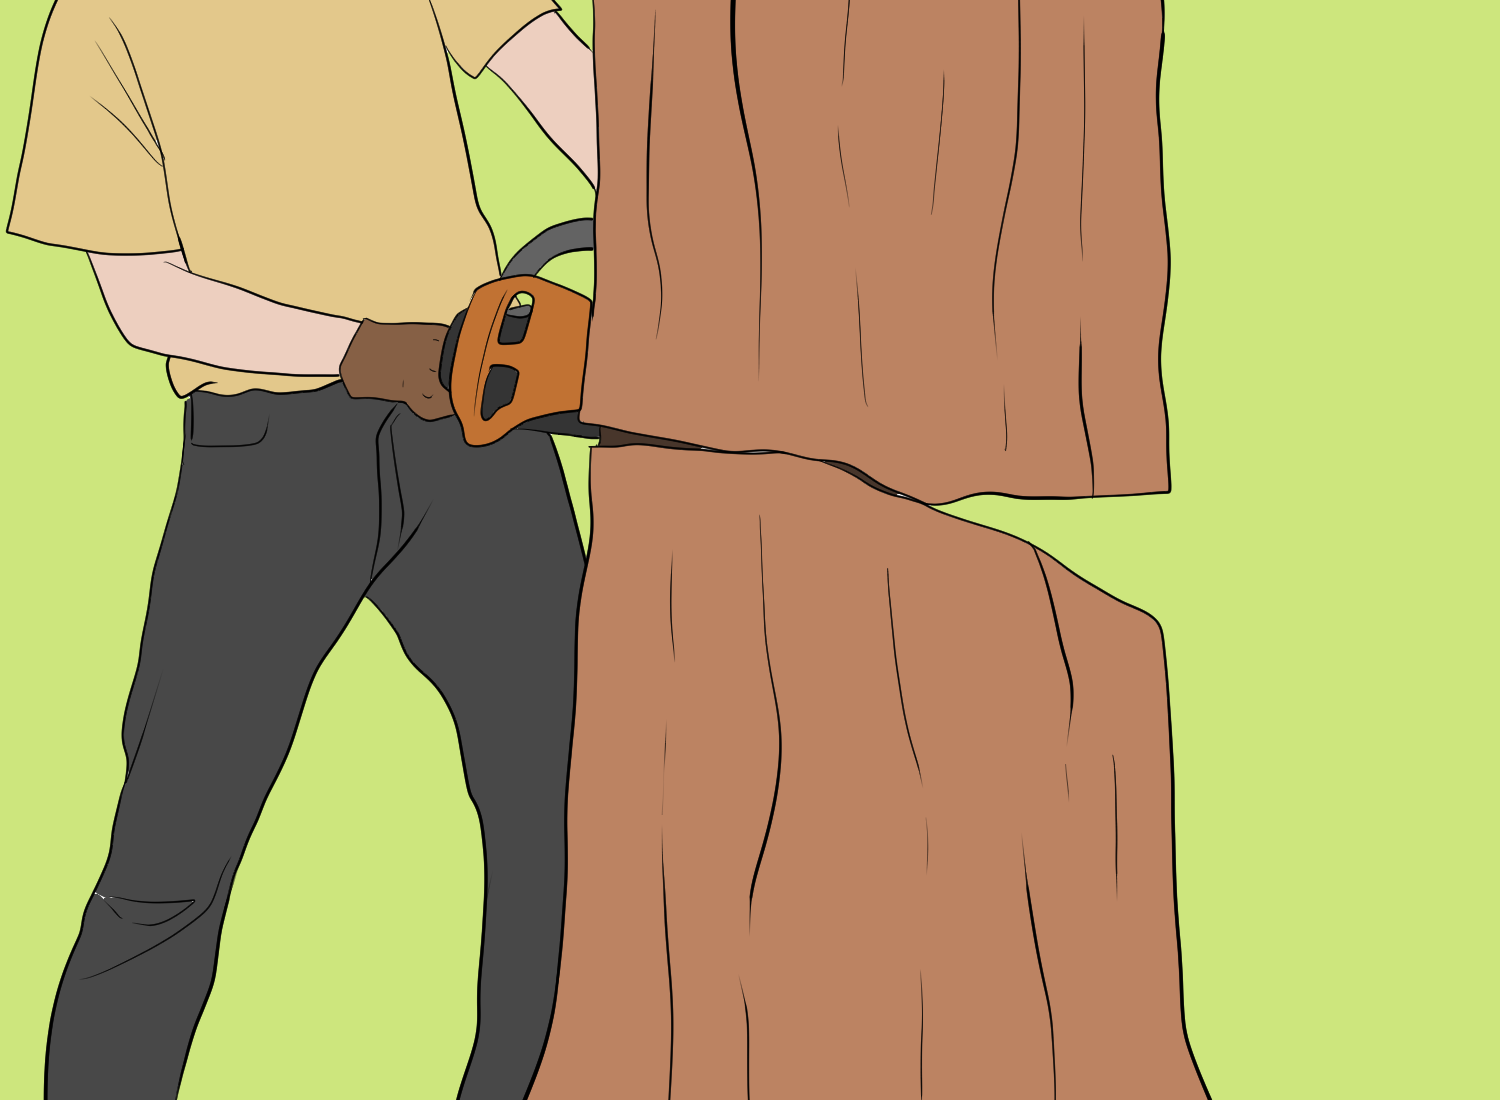
With the limbs and branches out of the way, it’s time to fall the tree. Make a 70-degree cut facing the direction you want the tree to fall, cutting about 1/4 into the tree’s diameter.
Turn your saw or axe so that the cutting blade is perpendicular to the wood. Cut horizontally.
When there’s only about 1/10 of the diameter left, stop cutting and take your pre-planned escape route to avoid potential hazards.
Step 4: Stump removal
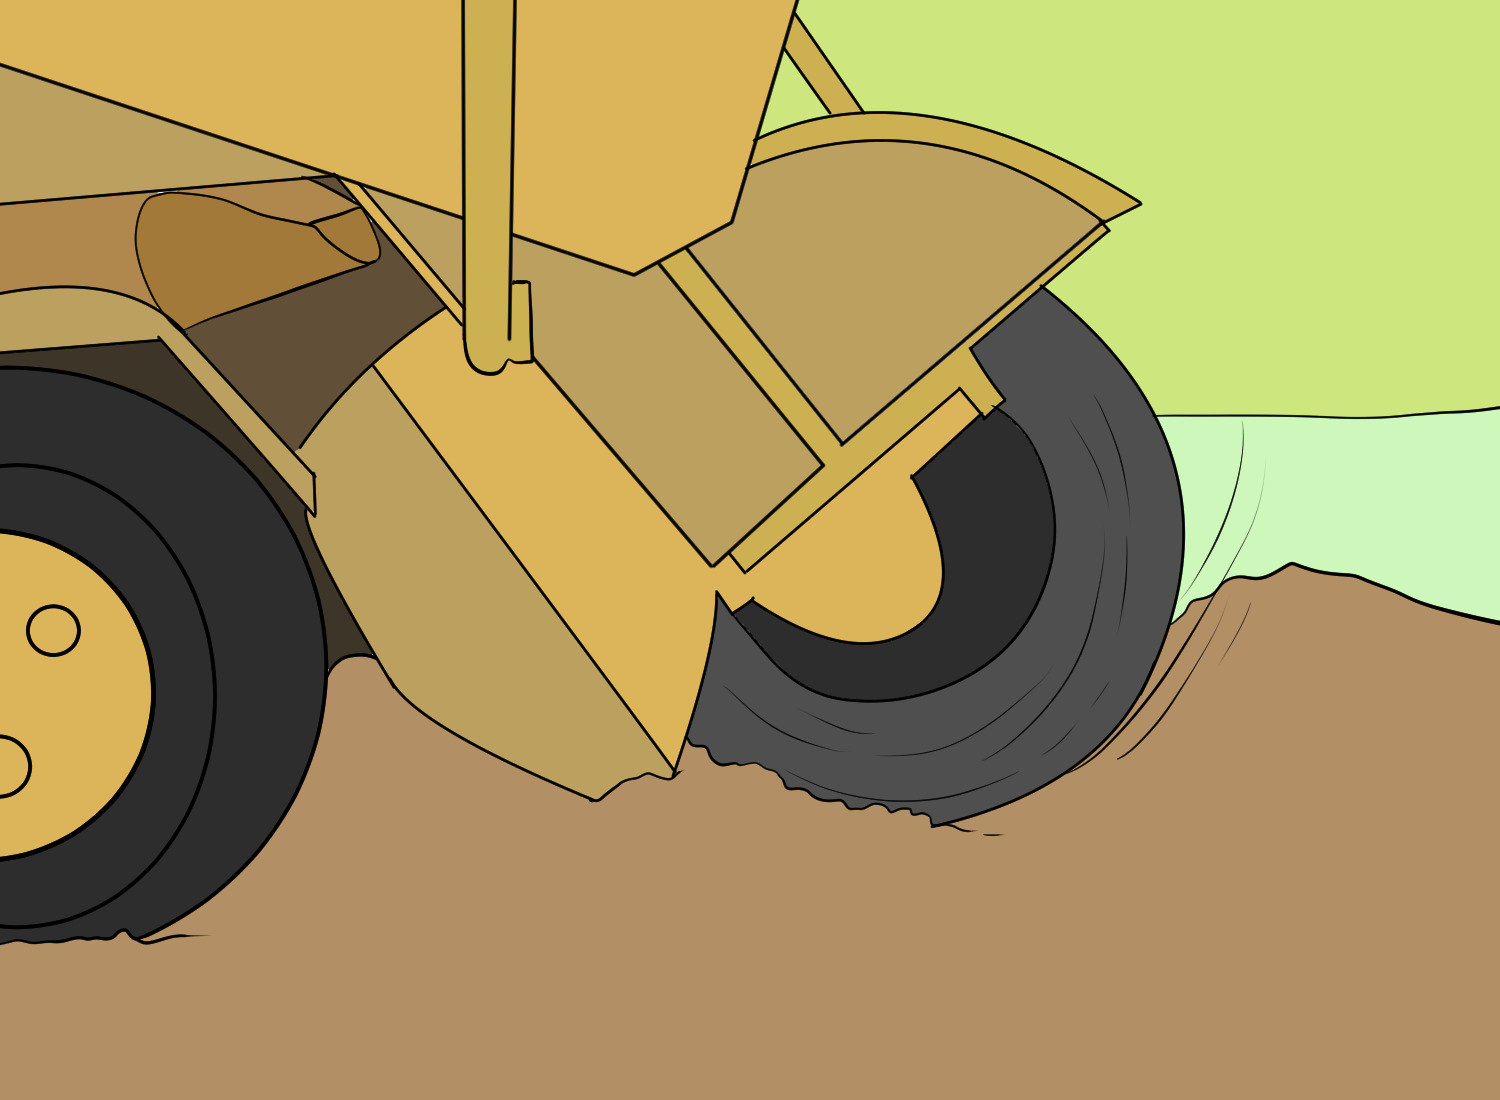
After the tree has been felled, you’ll be left with the stump. There are several methods for removing the stump, including grinding and chemical treatments. When using chemicals to remove tree stumps, drill holes into the stump, then pour the chemical stump remover into the holes.
If you prefer a more hands-on approach, you can also use a chainsaw to cut tree stumps at ground level or near them. Another option is burning the stumps by drilling holes, filling them with vegetable oil, and lighting charcoal bricks on top.
Reasons to remove a tree
You might be wondering why you should even consider removing a tree from your property. Trees can be beautiful and provide shade, but there are valid reasons for removal.
- Safety concerns, such as falling tree limbs, can pose hazards to people and property.
- Aesthetics are another reason – perhaps that once-lovely tree is now an eyesore, or it’s blocking a stunning view.
- Lastly, when a tree is diseased,1 removing it can help prevent the spread of illness to other plants in your yard.
Safety concerns
Safety is a top priority when it comes to tree removal. A tree with weak limbs or unstable roots poses a risk to your house, car, and even your family.
Cutting away these hazards can give you peace of mind and protect your property from potential damage.
Additionally, always remember to wear appropriate safety gear, such as gloves, goggles, and a hard hat, and enlist a helper to ensure the process runs smoothly and safely.
Aesthetics
Removing a tree can dramatically enhance the overall look of your yard or landscape. Overgrown or misplaced trees can block sunlight, limit your landscaping options, or obstruct your view.
Of course, there are also potential drawbacks to consider, such as the loss of shade, wildlife habitat, and possible soil erosion. Ultimately, you’ll need to weigh the pros and cons before deciding to remove a tree for aesthetic reasons.
Disease prevention
If your tree is infected with a disease or infested with pests, removing it can help prevent the spread of illness to other plants in your yard.
After cutting down the tree, it’s important to clean up the area and remove the stump to prepare the soil for replanting.
If you choose to use a stump grinder, make sure to take the necessary safety precautions, such as wearing protective eyewear, earplugs, and gloves.
Transplanting vs. removal
In some cases, you may want to consider transplanting a tree instead of completely removing it. Transplanting involves moving a tree to a new location, but it can be costly and risky.
This option might be appropriate if you’d like to move a small tree to a different location or if you’re concerned about the environmental impact of tree removal.
Hiring a professional arborist
While DIY tree removal can be an exciting and rewarding experience, there are times when it’s best to call in the professionals. Hiring a professional arborist offers numerous benefits, including safety, efficiency, and expertise.
A professional can help you assess your tree removal project, navigate local regulations, and ensure a smooth and successful process from start to finish.
When to hire a pro
It’s recommended to hire a professional for tree removal if you don’t have the proper tools and expertise, the tree is too large or complex, or you’re concerned about potential property damage or personal injury.
Professional arborists have the training and experience necessary to safely remove trees, minimizing the risks associated with DIY tree removal.
FAQ's
Removing large trees yourself is quite an undertaking compared to small trees, but you can make it manageable by taking the proper safety precautions.
Begin by evaluating the situation and estimating a falling zone, then water the tree soil before you start, and be sure to wear the necessary protective gear.
Notch out a side of the trunk in line with where you want the tree to fall, and enlist a lookout for maximum safety. Cut the trunk into sections if it’s too big to fall safely in one piece.
Finally, you’ll be ready to enjoy the open space your tree-removal efforts have created.
Getting rid of unwanted trees can be easily accomplished with chemical control methods such as applying glyphosate directly to the leaves or using a basal bark treatment to target the roots.
Cutting down the tree and treating or grinding the stump can also help, as well as girdling or salting the stump.
With these tips in mind, you can quickly get rid of unwanted trees!
Wow! Rotting a tree stump with Epsom salt will save you years of waiting because it accelerates the decomposition process from three to seven years to 6-12 months.
This magical compound is a great DIY method for killing tree trunks, as it contains magnesium and sulfur, which are beneficial to plants in small quantities but deadly in large doses.
Get your tree stump gone in half the time, with Epsom salt!
Get ready to transform your space! After tree removal, prepare the ground by removing any debris and exposed roots.
Fill the hole with topsoil and wait for a week before spreading grass seed. Water the soil gently and you’ll be ready to go!


